There is this wonderful little local joint making some of the best bierocks I have had since the days of my Grandma’s cooking. The aroma of the freshly baked bread, the spices in the meat, and the glistening rows of perfectly golden puffs as you walk up to the bakery case…YUMMY!!! I have been driving everyone in our house more than a little crazy with my craving for one of these pockets of goodness for (I hate to admit this to you) months now. Thanks to Covid, this adorable local shop has impossible hours of operation.
So, I either need to stuff this nagging craving deep, deep down, OR, I need to figure out how to make these little guys for myself!
Nostalgia warning…I have thought about it and I had to be the only kid in my school going to their family’s annual Christmas dinner and having your choice of a dozen sauerkrauts, homemade sausages, not to mention dessert tables stretching over 4 tables. Yes, it was so much more than a simple holiday dinner . Imagine over a hundred of your first and second cousins, aunts, uncles, grandmas, great aunts and uncles, and so on, all gathered under one roof for a day of holiday celebration. We rented out the community center and had the biggest potluck buffet I have ever seen (to this day, nothing rivals it). Everyone’s Mother and Grandmother bringing in the family “secret” recipes with their little twist on tradition, secretly trying to outdo one another in the form of food…lol! And I actually thought it was normal to have 12 varieties of sauerkraut on the Christmas buffet!! Who knew?
I do remember these golden baked gems every year. No, not just one, but several “spins” on each family recipe. If only you could go back in time and tell your childhood self how lucky you are, right? 🙂 I only wish I had passed out recipe cards to all those talented women in my family bringing in all that amazing food fo the larger than life buffet! Oh well…c’est la vie!
So, in honor of the German half of my heritage and to put an end to this nagging craving, I am giving bierocks a try!
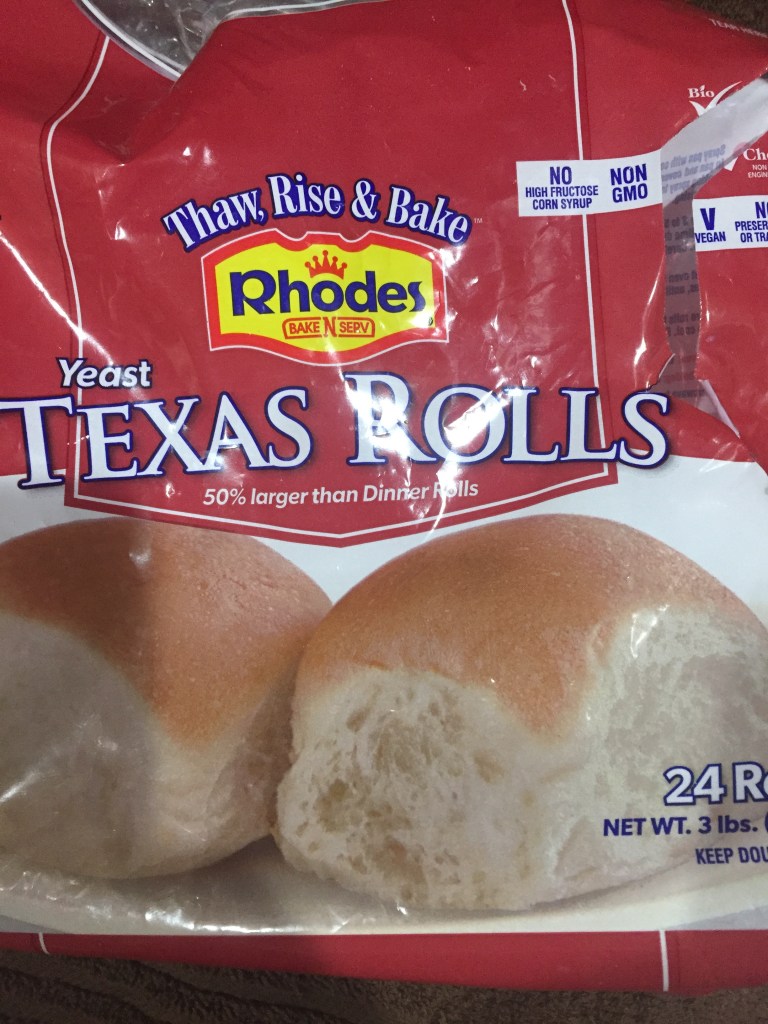
So, I found myself an easy way for my first attempt at the traditional recipe by using Rhodes Bake N Serv Yeast Texas Rolls. I will also use ground turkey in place of ground beef because that is what I have on hand. I used 3 lbs of Jennie O 90% lean ground turkey.
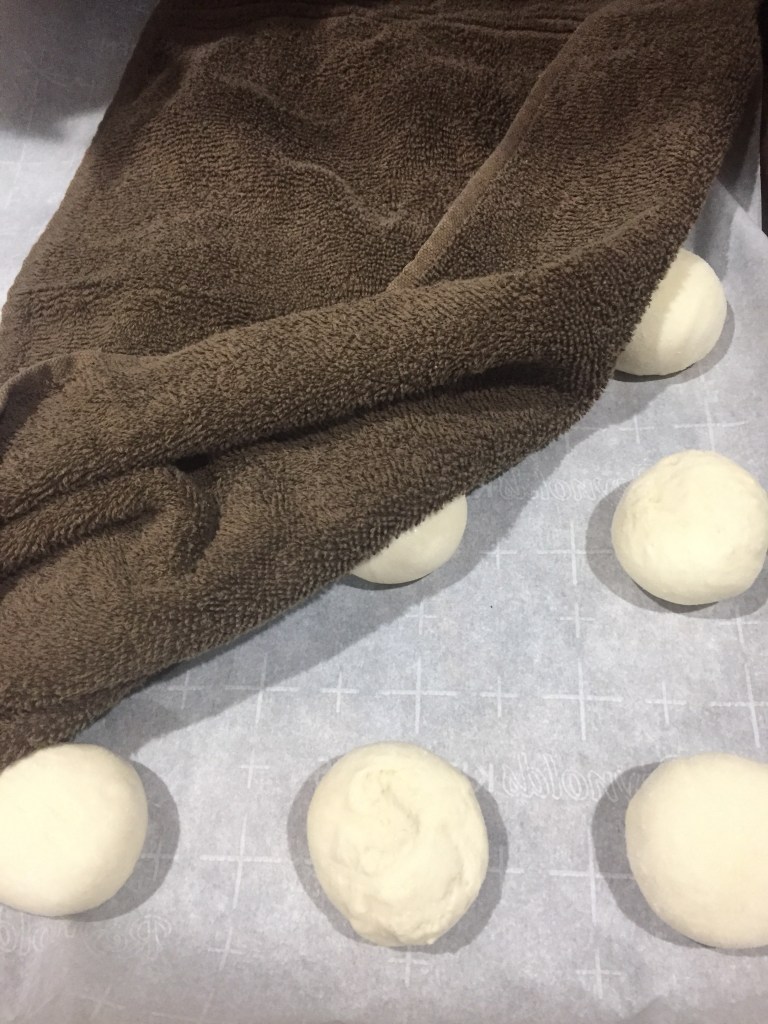
I spaced out the frozen rolls on parchment paper and covered with a tea towel. I will come back to these in about 3-5 hours.
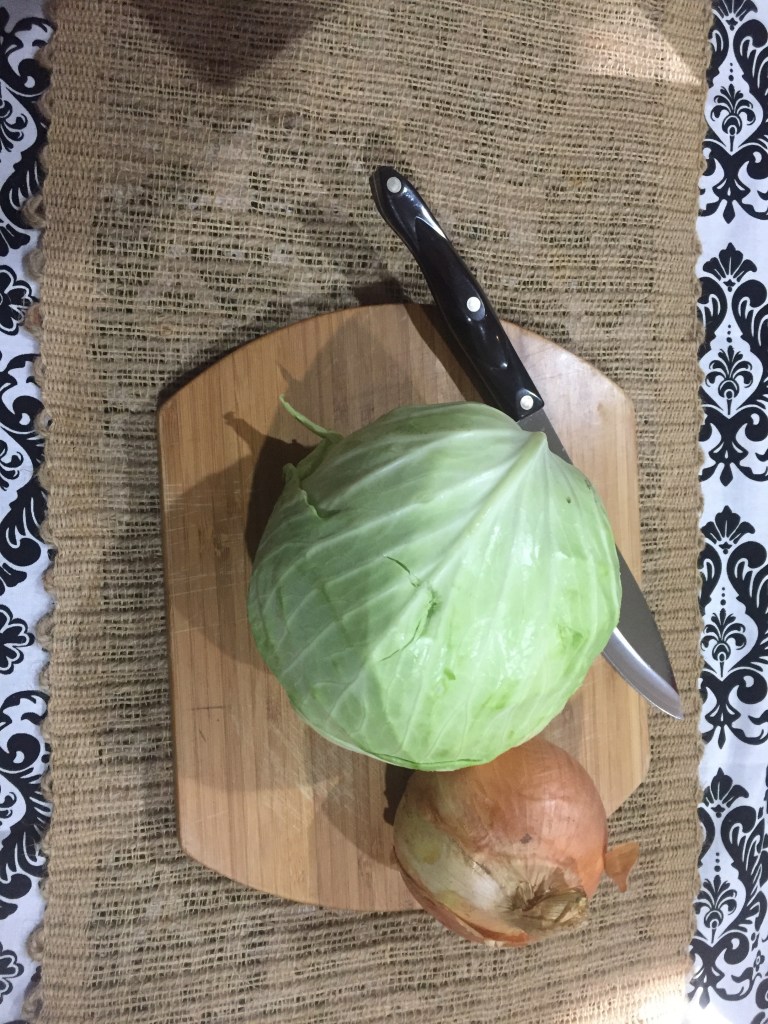
Next, I diced one large sweet onion and a head of green cabbage. My Culinary friends, if I am abusing this term (ahem…diced vs. chopped) my humble apologies😉 You basically do not want large chunks and pieces in your finished product. I worked with Chefs for years. I really should have retained a little more of the technical terms!
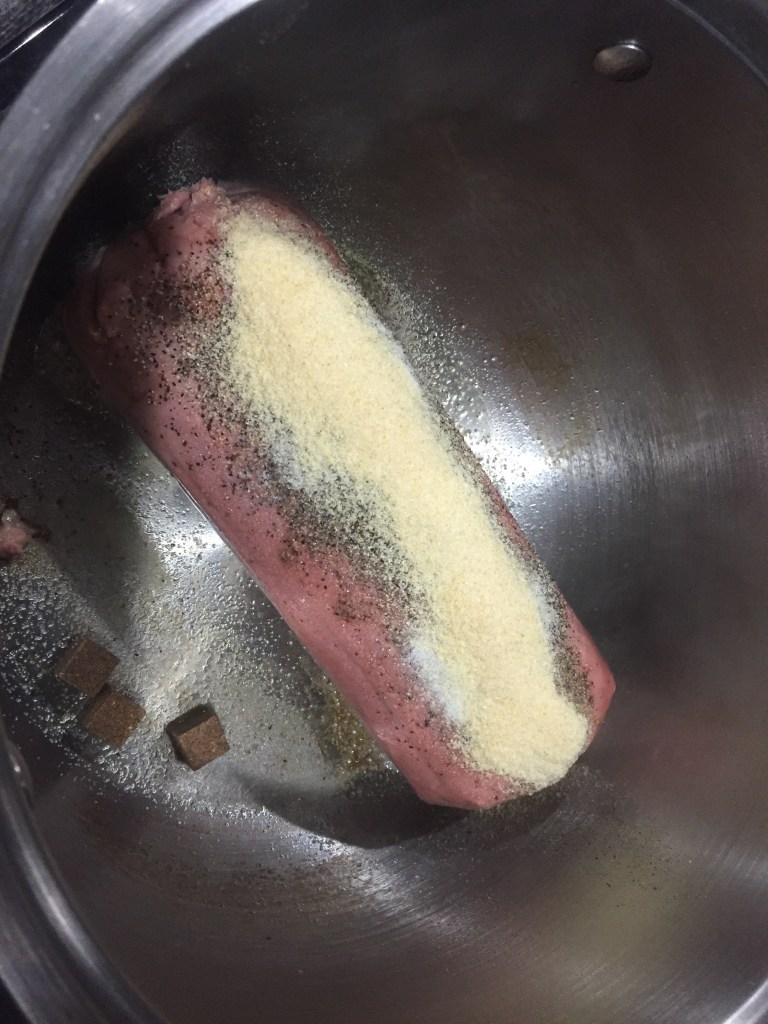
I know some recipes cook the onions with the meat, however, I did not. I browned my ground turkey with about 2 t. onion powder, 2 t. salt, 3 t. ground black pepper, and 3 beef bouillon or broth cubes (or equivalent). I added about a tablespoon of olive oil to the pot before adding the meat and spices.
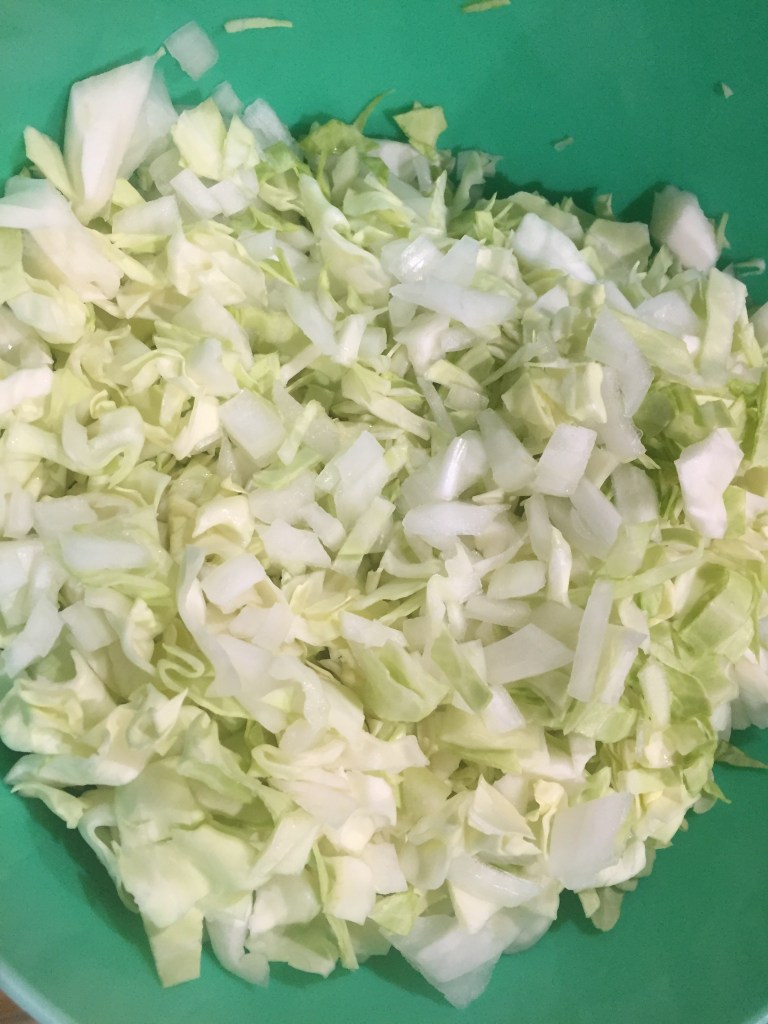
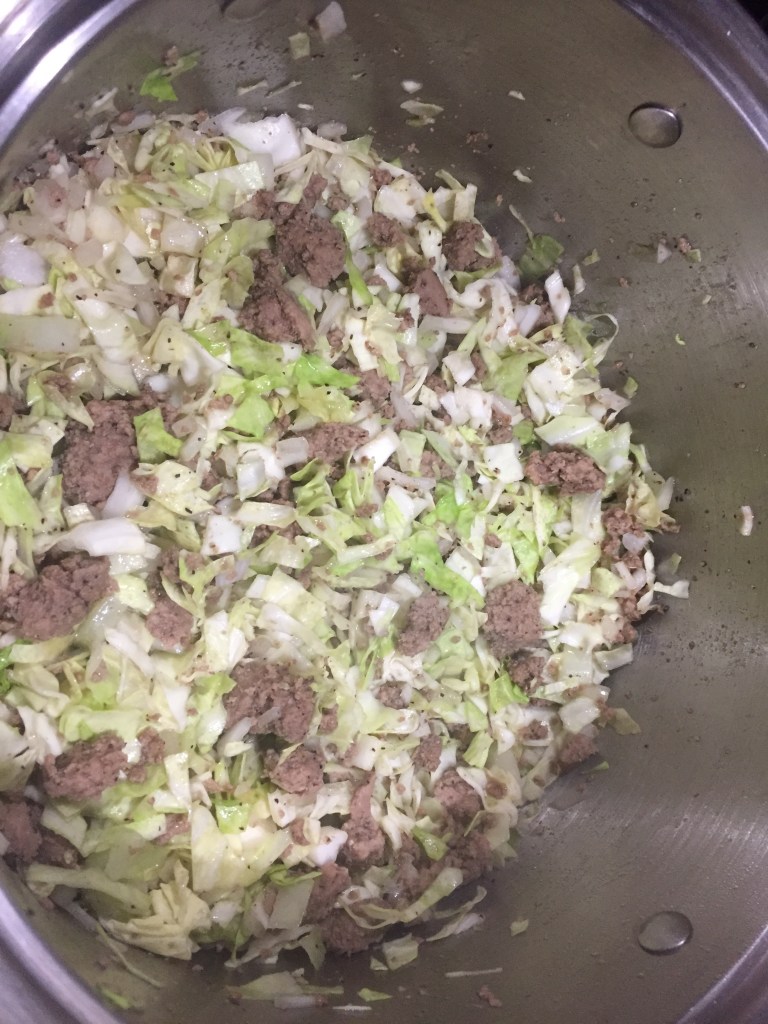
Add the diced green cabbage and sweet onion to your undrained meat. Give it a good stir to incorporate the ingredients, then reduce heat and add a lid. You will stir occasionally, keep the pot covered for 10-15 minutes, or until the onions are translucent and the cabbage wilted.
Remove the filling from heat and transfer to a colander. The filling cannot be too wet or you will have issues sealing the edges of your rolls or the filled bierocks leaking during baking. Drain the mixture for 10-15 minutes.
You will use two of the rolls per bierock for a large, entree size. If you are looking for a smaller version or perhaps something for a buffet or potluck, then one roll per bierock. I will continue instructions for the large version.
With the first roll, I simply pressed it into a large circle on the payment lined sheet tray. This is the base of the bierock. I added a 1/3 cup of filling by packing it tightly into a 1/3 cup measuring spoon and placing the filling in the center of the base.
Next, I repeated the pressing and stretching of the second roll for the top of the bierock. I carefully placed it over the filling and the bottom roll, lining up the edges of the rolls. I did an overlapping pinch closure (similar to pie crust) to seal the filling inside the top and bottom rolls.

Repeat this for all rolls. Cover the filled rolls again with your tea towel and allow them to rise for another 15 minutes. Once they have risen, brush the tops with melted butter.
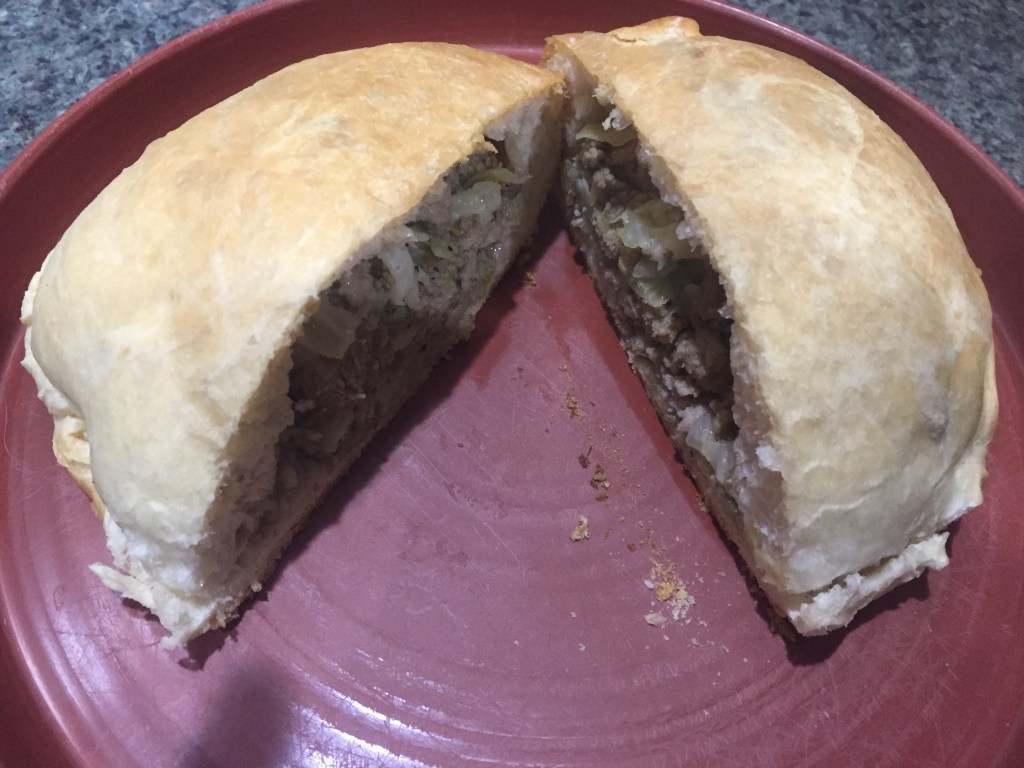
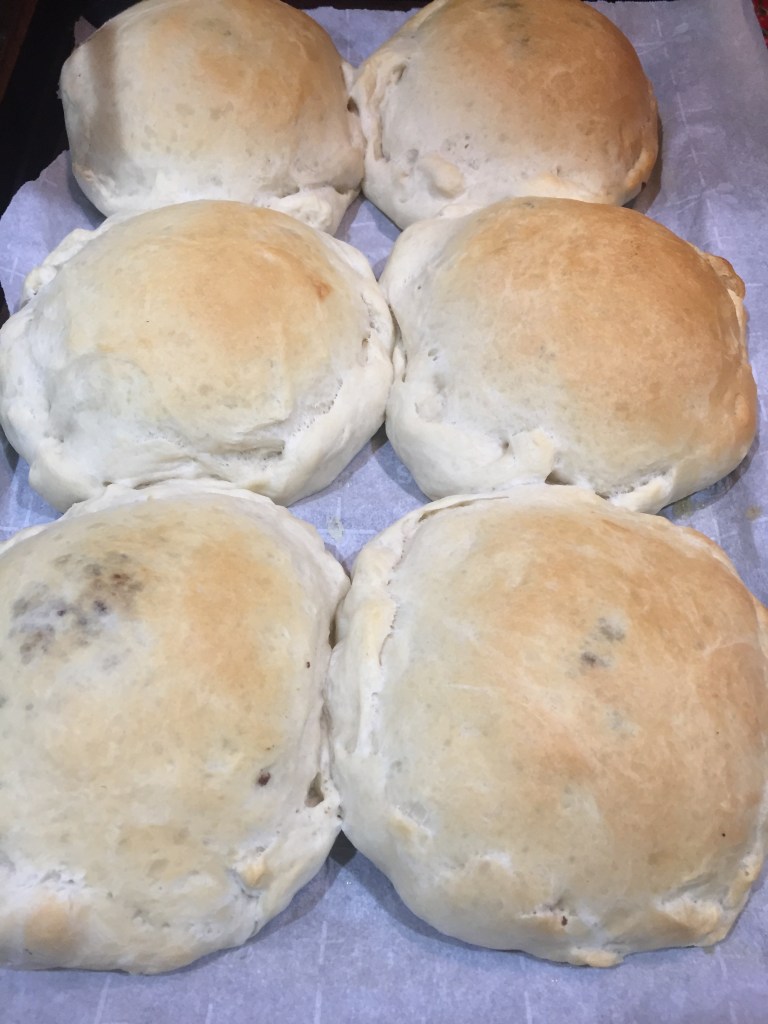
Bake on the parchment paper at 375 degrees for 20-25 minutes, or until golden. Remove the pan and cool. For the ones I didn’t serve right away, I wrapped them in foil and refrigerated. My recipe made 12 large bierocks.
And good luck with the sudden fan club entering your kitchen with the amazing smell of freshly baked bread and spices!!! These didn’t last a whole day. Even my oldest son visited at lunch and dinner to do “laundry”. (haha🙂) I will make these again. Huge hit!!!

- Recipe:
- 3 lbs ground turkey (or your choice of ground meat)
- 1 head green cabbage, diced
- 1 large sweet onion
- 2 t. onion powder
- 2 t. salt
- 2-3 t. ground black pepper
- 3 beef bouillon or broth cubes (or equivalent)
- 1 T. olive oil
- 1 24 count bag Frozen Rhodes Texas Yeast Rolls
- 1/4 c. butter
- Line sheet pans with parchment paper. Place frozen rolls on trays and cover with tea towels. Allow rolls to rise for 3-5 hours.
- In large pot, add olive oil and brown turkey and spices. Do not drain.
- Add diced onions and cabbage to the meat and stir. Reduce heat to low-medium heat, add lid to the pot, stirring occasionally for 15 minutes. The onions will be translucent and the green cabbage will be wilted and soft when the filling is ready.
- Transfer the filling to a colander and drain for 10-15 minutes.
- On the parchment lined tray, stretch and knead the base roll out into a circle.
- Add 1/3 c. filling.
- Stretch and knead a second roll for the top, and pinch the seam to enclose the filling.
- Cover the filled bierocks with a tea towel to rise again for 15 minutes.
- Brush the tops with melted butter after the rolls have risen.
- Bake for 20-25 minutes at 375 degrees, or until golden brown.
- Any bierocks not served immediately can be wrapped in foil and refrigerated. If freezing, add the foil-wrapped bierock to a freezer bag.